Cleaning and maintaining your boat trailer is as vital as maintaining your boat. The wheel bearing is one of those items that is quite often ignored. These small components provide smooth turning for your trailer wheels and carry heavy loads. When worn out or if they fail, they will leave you stranded. Therefore, every trailer owner must know how to replace a wheel bearing on a boat trailer.
This guide will teach you the whole process, from spotting when the wheel bearing needs replacement to installing the new one like a pro.
Why is Bearing Replacement Important?
Bearings are always exposed to heavy loads, especially in boat trailers. They hold the load, absorb the road vibration, and are occasionally subjected to water washing, especially seawater. With time, the grease breaks down, the seals go bad, and moisture destroys the bearing.
If you hear a grinding or squealing noise, feel wobbling in the wheels, or see grease leaking from the hub, it’s time to look at the bearings. Bearing damage to the spindle or axle can be avoided by replacing them early.
Tools and Materials You’ll Need
Before going through how to replace the wheel bearing on a boat trailer, you need to have all of these tools and supplies handy:
- Jack stands and Jack
- A lug wrench
- A flat-head screwdriver and pliers
- Punch and hammer
- Bearing socket or race driver (optional)
- Bearing packer (useful but optional)
- Marine-grade grease for wheel bearings
- Replacement bearing kit (Inner and outer bearings, races, seals, and a cotter pin)
- Shop rags or towels
- Safety goggles and gloves
Step-by-Step: How to Replace Wheel Bearing on Boat Trailer
Step 1: Preparing the Trailer for Safety
Begin by parking your trailer on a level surface and blocking the opposite wheels to hinder movement. Lift one side with a jack where you work and let it sit on a jack stand. Take the wheel off by loosening its lug nuts.
Step 2: Remove the Hub Assembly
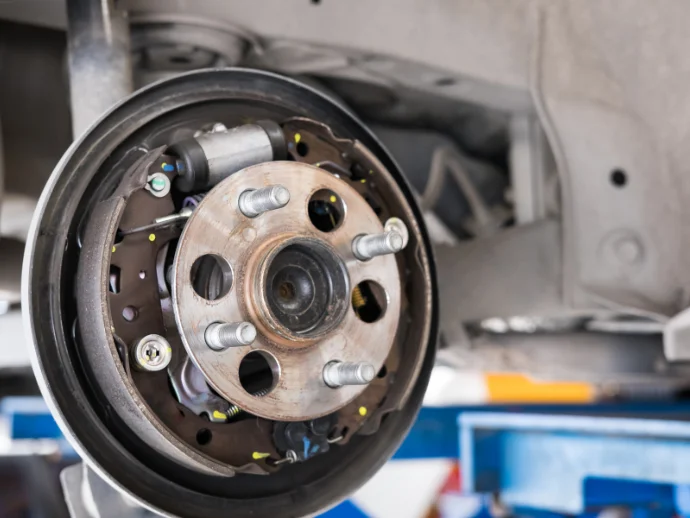
Once the wheel has been removed, remove the dust cap with a screwdriver. It may require a little hit with a hammer. A cotter pin securing the castle nut will be underneath the cap. Using pliers, straighten the cotter pin and remove it.
After removing the washer and unscrewing the castle nut, cautiously pull the hub away. It should be simple to remove the outer bearing. Keep it aside and completely slide the hub off the spindle.
Step 3: Remove Inner Bearing and Seal
Flip the hub to reveal the inner bearing and grease seal. Use a screwdriver or seal puller to gently pry the seal out, taking care not to scratch the hub in the process. Take out the inner bearing after removing the seal.
Throw away the seal and check the bearings for wear, scoring, or heat damage; replace any damaged ones.
Step 4: Remove and Replace Bearing Races (If Needed)
Inspect the bearing races inside the hub. If scratched, pitted, or otherwise discolored, use a hammer and punch to tap them out.
Once the new races are set, align them and tap them in gently, working evenly around the edges until they are flush with the surface of the hub. You may occasionally forego this step if your races are still in good condition.
Step 5: Thoroughly Clean
Grease should be removed from the hub, spindle, and bearings (if reusing) using a fresh cloth. Residual dirt or grease would hamper performance or cause failure.
Inspect the spindle for any grooves or scoring. If this is the case, it might require professional repair or replacement.
Step 6: Grease the Bearings
Use marine-grade grease designed for trailer wheel bearings. It resists water, preventing rust.
Bearings can be packed with grease by hand by forcing grease into the rollers until it squeezes out the other side. Using a bearing packer will make it less messy and faster. Ensure that inner and outer bearings are packed fully with grease before placement.
Step 7: Putting the Hub Back Together
Put the packed inner bearing in at the back of the hub, and then tap the new grease seal in place using a soft mallet or block of wood. Slide the hub back onto the spindle, and install the outer bearing, washer, and castle nut.
The castle nut is tightened while spinning the hub to seat the bearings. Then, it is backed off just enough to allow a little play; anything more or less might not be good. Insert a new cotter pin and bend the ends to hold it in place. Tap the dust cap or Bearing Buddy back onto the hub.
Step 8: Reinstalling the Wheel and Testing
Adjust the lug nuts in a star order after reinstalling the wheel on the hub. Lower the trailer and torque the nuts completely to the manufacturer’s specs.
Spin the wheel by hand. It should move freely without any grinding sounds or side-to-side motion. If necessary, repeat for the other wheel.
Post-Replacement Tips
- Check Grease Regularly
Let checking grease levels before going on a long trip become a habit. When grease is low or contaminated, it’s the first cause of bearing failure. It must be cleaned and repacked if it looks milky or polluted with metal flakes.
- Using Bearing Protectors
Using Bearing Buddies or any other similar bearing protector helps maintain the internal pressure in the hubs, keeping water out and maintaining proper grease levels. Just remember—do not overfill; the seals may get damaged in the process.
- Rotate the Tires Periodically
Rotating the tires balances wear and may indicate early signs of uneven load distribution or alignment issues. When rotating tires, take the time to check the bearings and grease levels.
- Store Your Trailer Properly
If a trailer sits for long periods, especially outdoors, cover the wheels and keep them off wet ground. This storage may invite moisture and rust inside the hub. Also, jack up the trailer a little or move it from time to time to prevent bearing lock-up.
How Often Should You Replace Boat Trailer Bearings?
There is no hard and fast rule, but the experts recommend inspecting and servicing your boat trailer bearings at least once yearly or more often if you tow very frequently or launch in saltwater. 10,000 to 12,000 miles are good mileage benchmarks for repacking or replacing bearings.
On the other hand, if your trailer endures harsh conditions, including
- Frequent saltwater immersion
- Long-distance towing
- High humidity or muddy terrain
…then inspections can be considered every six months.
It’s also equally important to check these before and after every major trip.
A quick inspection can detect early indicators such as a loose hub, leaking grease, or heat buildup. If a bearing exhibits any wear, replace it immediately. Although bearings are cheap, failure-related damage can be expensive.
By remaining vigilant, you can safeguard your investment, lower traffic hazards, and ensure that your boat always arrives at the water safely.
Conclusion
One of the most useful skills a boat owner can possess is the ability to replace the wheel bearing on a boat trailer. It prolongs the life of your trailer and protects you from unplanned malfunctions.
By following these instructions on how to replace wheel bearings on a boat trailer, using the appropriate equipment, and routinely checking your bearings, you can maintain your trailer in excellent condition and enjoy stress-free towing for many years.


