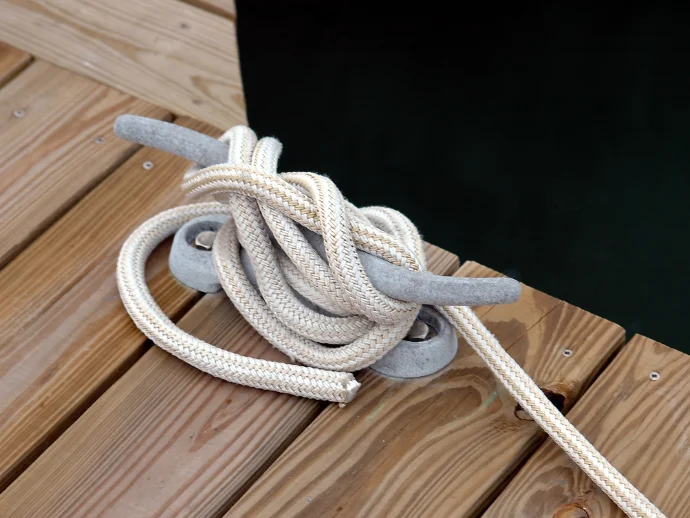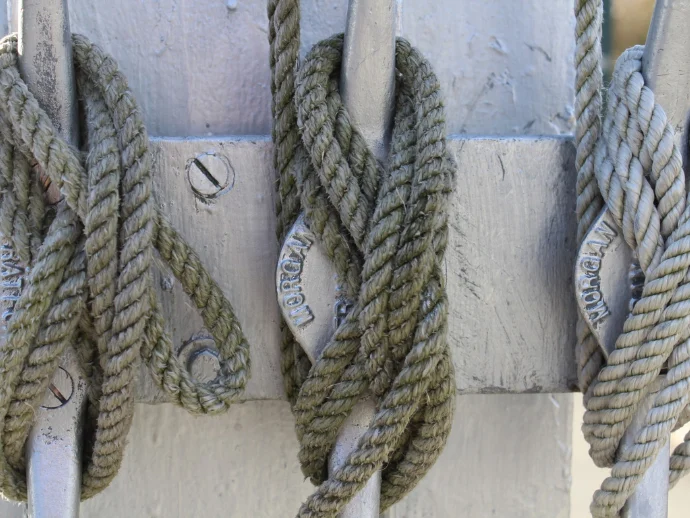
One of the fundamental skills any boater should have in their arsenal is learning how to tie the cleat hitch. This reliable knot will secure your boat under varying loads and conditions, whether docking the boat, securing the halyard, or tying off a tender. Some knots might need more dexterity or time to tie, even in good situations, but the cleat hitch is different because it is fast, strong, and easy to release, even after holding under heavy load. So here are tips on when, why, and how to tie a cleat hitch every time.
What Is a Cleat Hitch and Why Is It Important?
A cleat hitch is a knot used to fasten a line to a cleat, usually found on docks and boats. The cleats usually have a T shape, so the line is wrapped around them and finally locked with little movement.
This is so much trusted because:
- Under pressure, it won’t jam.
- Even in an emergency, it is quick to tie or untie
- It will also better distribute the load and lessen line wear.
It is often used for tying dock lines, mooring lines, and other types of temporary holds.
Step-by-Step Instructions to Tie a Cleat Hitch
Let’s now dive into a clear, beginner-friendly step-by-step guide on how to tie a cleat hitch:
1. Wrap the Line Under the Base
Start by wrapping the line one full turn under the base of the cleat, coming from the direction from which the tension will come on the line. This “dead turn” produces friction and holds the line in place.
2. Establish a Figure-Eight Pattern
Coming over one horn of the cleat and smoothly and cleanly crossing over to the opposite horn, thus initiating the figure-eight pattern. Cross back again, making sure to lay the line on the cleat flat and snug without twists or slack.
3. Completing the Locking Hitch
Make a small loop with the running end of the rope and twist it; slip it over the closest horn of the cleat. This final half-hitch is critical, as it locks in the figure-eight so that it can’t come undone under tension if the rope starts to slip.
4. Tighten and Cut
Pull that tail hard to set the hitch. Then coil the excess neatly nearby to avoid hazards.
Common Mistakes to Avoid
Boatmen sometimes tend to ignore the very basics. Here are important errors to avoid:
- Omitting the locking hitch: A final locking hitch twist prevents a slip under tension.
- Messy Wraps: Crossed or bunched lines decrease holding power and can cause jamming.
- Incorrect Method: The cleat will not hold the knot correctly if it is tied from the point where the line is loaded.
Working dry can help to establish muscle memory before even placing it under the docks under pressure.
Variations and Expert Advice
Though the standard cleat hitch suffices most of the time, the experienced sailors sometimes go for a little adaptation:
- No Lock for Quick Release: On racing sailboats or big boats, crews may leave off the finishing half hitch for a fast release when required. This should be done only if you can stay by and watch the line.
- More Wrap for More Hold: In rough conditions or with slippery synthetic lines, an extra figure-eight loop gives a bit more hold.
- Keep It Simple: Don’t introduce layers of wraps or extra hitches, as that complicates the knot and makes it hard to release. Unless there is a compelling reason to do otherwise, stick with the classic.
When and Where to Use a Cleat Hitch?
There are various situations in which learning to tie the cleat hitch is applicable:
- Docking a vessel: The most popular application is for securing to a pier or dock.
- Securing halyards: On sailboats, quick and safe tensioning is paramount.
- Temporary mooring: It should be secure but easy to release when you need to hold.
Avoid using a cleat hitch for towing, when an extremely heavy load must enter a site, or as an additional safety measure.
Practice Tips to Perfect Your Technique
The key to mastering this cleat hitch is repetition. Keep a little cleat and some rope at home, and perform the steps frequently:
- Try tying it with gloves on; it will be useful in colder climates or when sailing in winter.
- Practicing letting it go under load will help you know what to expect when tension is present.
- Use different types of rope to see how it holds in braided vs. twisted lines.
As with any fundamental ability, your confidence and efficiency will increase with practice.
Conclusion
Knowing how to tie a cleat hitch is more than just a knot: it’s safety, convenience, and confidence on the water. Whether you’re an old hand or a beginner, this skill will ensure that your boat is safe, your lines are neat, and your docking experience is smooth all the way.
Quick Tip: Always check your cleat hitch before setting off. A well-tied cleat hitch is the first defense of any market against costly mishaps or drifting boats.


