Tying the right knot can make all the difference when you are out on the water. Whether you are docking your boat or rescuing someone, the right boating knots help you do so properly. These knots are not just for sailors. They are crucial for anyone who enjoys life on the water. This guide walks you through the most useful boating knots and how they work. You don’t need to be a pro to master these. With a little practice, anyone can learn. Let’s get started on the knots every boater should know.
Types of Boat Knots
Hitch Knots
1. Bowline
This knot forms a fixed loop at the end of a rope. It won’t slip or jam. It is strong and easy to untie. Use it to tie a loop around a piling or rescue ring. On top of this, you can use it to secure a mooring line. It remains reliable under tension and does not tighten under load, making it great in many boating scenarios.
How To Tie It
- Form a small loop in the rope near the end.
- Pass the working end through the loop.
- Wrap it around the standing part.
- Return it down through the loop.
- Tighten gently while holding the loop.
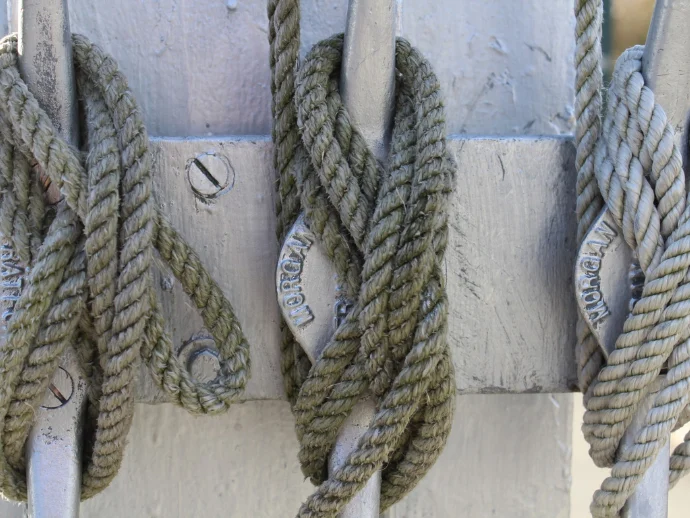
2. Cleat Hitch
This knot secures a line to a cleat with ease. It holds tight under tension and is very quick to release. Ideal when docking or anchoring. It resists slipping even when the boat rocks or the tide changes. This knot is a must-learn for anyone handling docking lines in varied conditions.
How To Tie It
- Bring the line over one horn of the cleat.
- Wrap it underneath the opposite horn.
- Cross over the top again.
- Form a figure-eight around the horns.
- Finish with a half-turn loop under the last crossover.
Loop And Stopper Knots
1. Figure-Eight Loop
Creates a strong, secure loop that’s easy to inspect. It resists slipping and can be undone even after a heavy load. Commonly used to tether a fender, tie to a tow line, or create a stopper loop in a line. It is widely trusted because it maintains its integrity under strain and is easy to adjust.
How To Tie It
- Make a loop in the rope.
- Form a figure-eight shape.
- Pass the rope end through the bottom of the eight.
- Pull tight to shape the loop.
- Dress the knot, arranging all parts neatly.
2. Double Overhand Stopper
Serves as a reliable end-of-line stopper. It prevents a rope from slipping through a fairlead or block. The double wrap makes it bigger than a regular knot, but still compact. It is handy to tie quickly and secure line ends before docking or trailering. Makes retrieval easier and keeps rope ends tidy.
How To Tie It
- Take the rope end and wrap it twice around your fingers or the standing part.
- Pass the end through both loops.
- Pull snug to form a compact knot.
- Trim the tag end if needed.
- Dress it for neatness.
Joining and Bend Knots
1. Sheet Bend
It joins two ropes of different thickness evenly. It is stable and easy to untie. Works well for extending lines or tying a rescue loop. Even a heavy load won’t tighten it permanently. Great for merging a thinner rope to a thicker one when rigging extra length. It stays secure under shifting loads and vibrations.
How To Tie It
- Form a simple loop in the thicker rope.
- Pass the thinner rope through the loop.
- Wrap it under and around both parts of the loop.
- Tuck it under itself.
- Pull both ropes to tighten the bend.
2. Double Sheet Bend
This is the same as the sheet bend, but with extra turns. It increases security when ropes face strain. Ideal for joining slippery or very different lines. Better suited for harsh conditions or dynamic loads. It adds a layer of safety when tying critical towing or anchoring connections.
How To Tie It
- Make a loop in the thicker rope.
- Pass the thinner rope through the loop.
- Wrap twice around the loop’s standing and working part.
- Tuck under the last wrap.
- Pull both ropes tight to form a firm bend.
Binding And Decorative Knots
1. Reef Knot (Square Knot)
Used to tie two lines of similar thickness together. It holds well when both ends are under load in opposite directions. Handy to secure sails or bundle gear. Not recommended for critical safety, but works well in controlled applications. It’s simple and quick, making it practical in day-to-day boating tasks.
How To Tie It
- Cross the right end over the left.
- Wrap under and pull tight.
- Cross the left end over the right.
- Wrap under and tighten.
- Check symmetry before use.
2. Figure-Eight Stopper
Makes a clean, visible knot at the rope end. It prevents slipping through deck fittings or through holes. Easy to recognize and remove. Useful for mooring lines, dock lines, or lines running through fairleads. Adds safety and clarity to working lines in busy decks.
How To Tie It
- Create a simple loop in the rope.
- Cross the end over itself.
- Wrap under and bring back through the original loop.
- Pull to form the familiar figure-eight shape.
- Dress the knot tidily.
Specialty And Rescue Knots
1. Water Knot
It joins two pieces of webbing or tape safely. Often used in rescue or rigging situations. It maintains structure under weight and won’t slip when wet. Useful when creating slings or handling non-rope material. Preferred in high-demand conditions where safety matters and webbing needs clean joins.
How To Tie It
- Tie a loose overhand knot in one webbing end.
- Feed the second piece backward along the original path.
- Continue the loop in reverse.
- Pull both ends to tighten.
- Dress and adjust until firm.
2. Rolling Hitch
Secures a rope to a line or spar under load. It resists slipping along a pole or rope. Ideal for making adjustable attachments or belaying lines. Works well when fast adjustments are needed under tension. Useful for rigging, especially when winds shift or loads change.
How To Tie It
- Wrap the rope around the spar twice.
- Cross over itself and wrap once more.
- Finish with a half-hitch.
- Slide into position.
- Pull both ends to tension fully.
Tips for Knot Maintenance
- Always test a new knot before relying on it.
- Keep rope clean and dry when possible.
- Avoid knotting over worn sections.
- Replace frayed ropes promptly.
- Store ropes loosely coiled to prevent kinks.
- Untie knots after use to release stress and prevent jamming.
The Bottom Line
Learning and mastering boating knots is key to safe seamanship. Each knot serves a clear function and helps you manage lines efficiently on deck. Take time to practice tying and untying them in dry conditions before using them under load. With practice, these skills become second nature. You’ll build confidence, save time while sailing, and stay safer as you explore the open water.


